I started running Grafana and InfluxDB on one of my docker hosts at home but quickly realized there would be a problem when my IoT devices were all running on an internet access only network. There wasn’t a great way push data collected back onto my private network. There were a couple of options for running Grafana and InfluxDB in the cloud, each with some pros/cons but the one thing I decided was running it on Azure.
- Azure Virtual Machine
- Azure Container Instances
- Azure App Service Linux Containers
I had a few criteria that help decide:
- Cheap as possible
- Minimal overhead for management (don’t want to get stuck doing updates constantly or security updates)
- Secured with TLS
- Cheap
The only option above that met the criteria was #3 (obviously, if you read the title). Azure App Service Linux combined with a Storage Account for persistent storage is somewhere < $20/month give for take, includes a free TLS certificate, and has little management overhead because it’s PaaS. Azure Container Instances satisfy most of the requirements, except I would need to deal with the TLS termination (and certificate) by using something like NGINX or Traefik to reverse proxy and Let’s Encrypt for a certificate, but this all gets included in the App Service route.
To make things relatively easy, we’re going to use the standard Docker images for Grafana and InfluxDB. I’ll show a couple of different methods for setting up the services.
Overview of Setup Process
If you don’t actually care what (or why) is going on in the steps and you just want to get your resources stood up go ahead and skip this section (you’ll might need to come back and reference something later). The actual step by step will be below so it’ll be easier to follow along when you are actually doing the steps.
In the end you’ll setup 4 services, 1xApp Service Plan (Linux), 2xApp Services, and 1xStorage Account.
Using a single App Service Plan means both App Services are sharing resources, but also cutting costs. Using seperate App Services reduces complexity on managing the containers, technically you can use Docker compose and setup a multi-container service, but you don’t have any financial benefit and it prevents you from having custom DNS names per service (at least I’m too lazy to figure it out).
Azure Storage Account will be the persistent storage for configuration and data of the two services. Note that without the Storage Account, everytime your App Service gets automatically redeployed (think hardware failure) you’ll loose all your data and settings.
The gist of the App Serivce setup will be to create the services using the docker containers and using Application Settings to setup environmental variables and Path Mappings to mount persistent storage. InfluxDB has a couple of startup values that will be needed but can be removed once initializtion has completed.
What I won’t cover as part of this guide is setting up custom domains and TLS certificates as I think there is probably enough information around the internet. However we will turn on HTTPS only so all connections will be encrypted. App Service will automatically provide SSL termination for your Docker container and note the standard ports for InfluxDB and Grafana will just be 443.
For the following steps you’ll be using the Azure Portal.
Assumptions are that the Resource Group you’ll use is called “Grafana”, but you can easily call it whatever you want.
App Service Plan
- Create an App Service Plan
- Use the following settings:
- Resource Group: Grafana (if doesn’t exist create one)
- Name: Grafana
- Operating System: Linux
- Region: West US (or wherever is closer to you)
- SKU and size: Basic B1 (this is the cheapest if you want custom DNS)
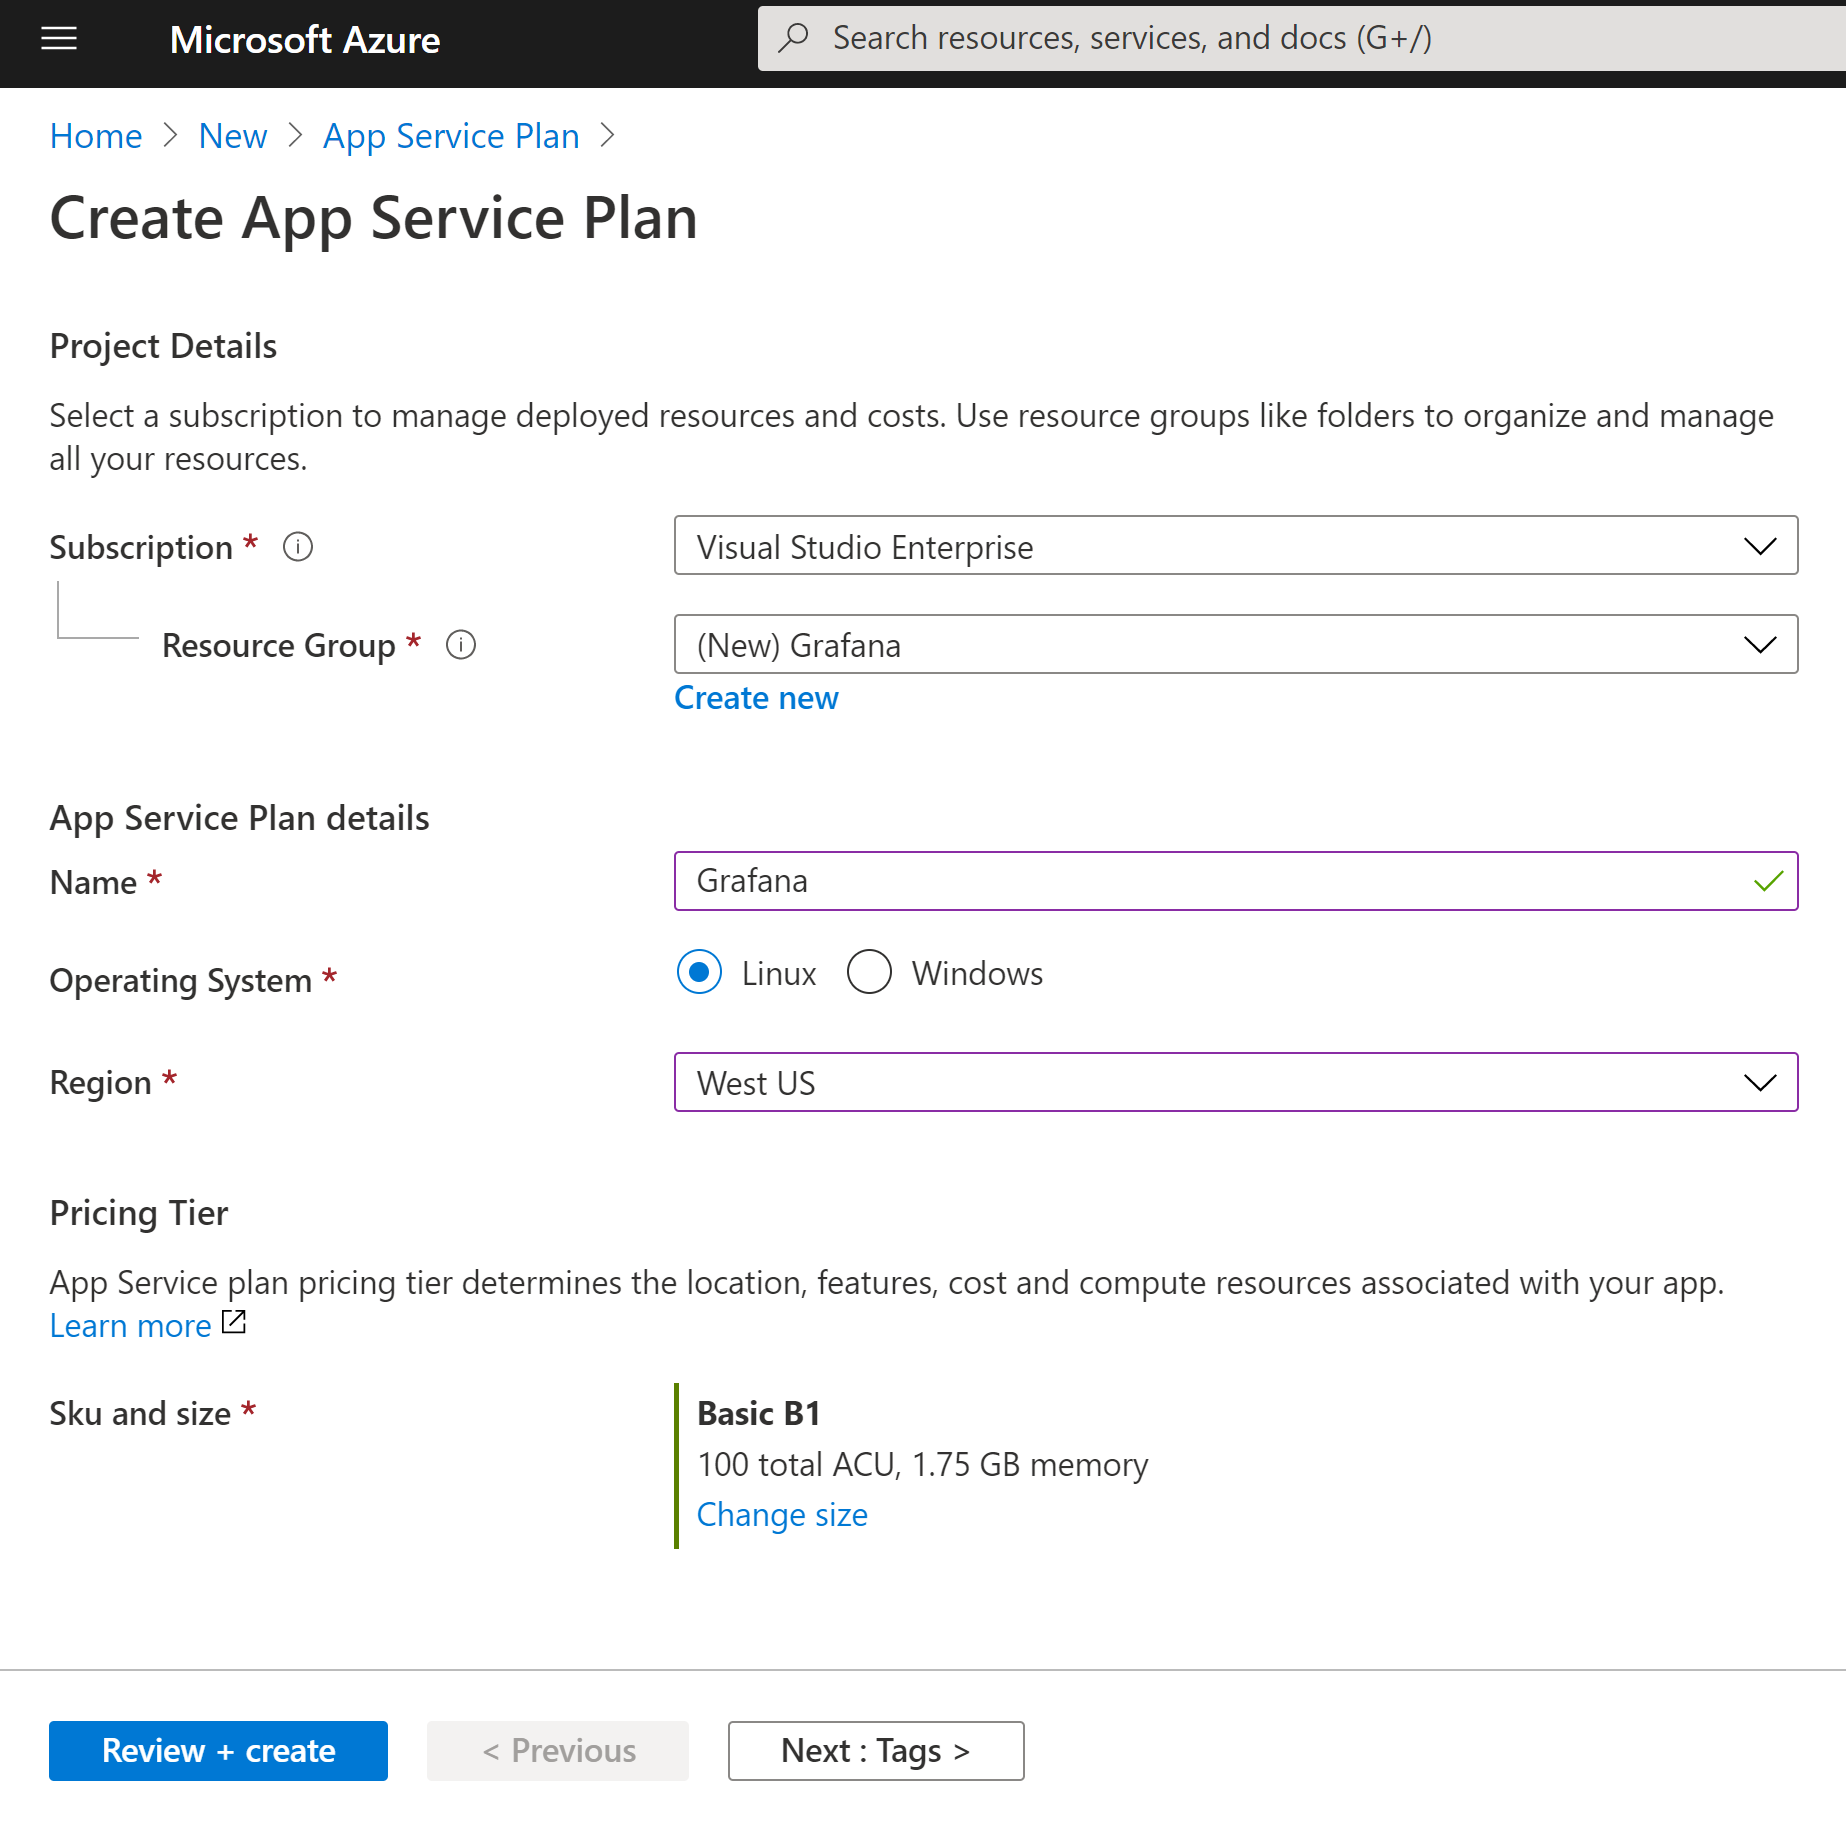
- Click Review & Create
- Create the Resource
Storage Account
- Create a Storage Account
- Use the following settings:
- Resource Group: Grafana (no reason it shouldn’t exist by now)
- Storage Account Name: grafanadata (will need to be globally unique)
- Location: Select the same as App Service Plan
- Performance: Standard
- Account kind: Storage V2
- Replication: Locally Redundant storage (LRS) (whatever you want)
- Blob access tier: Hot
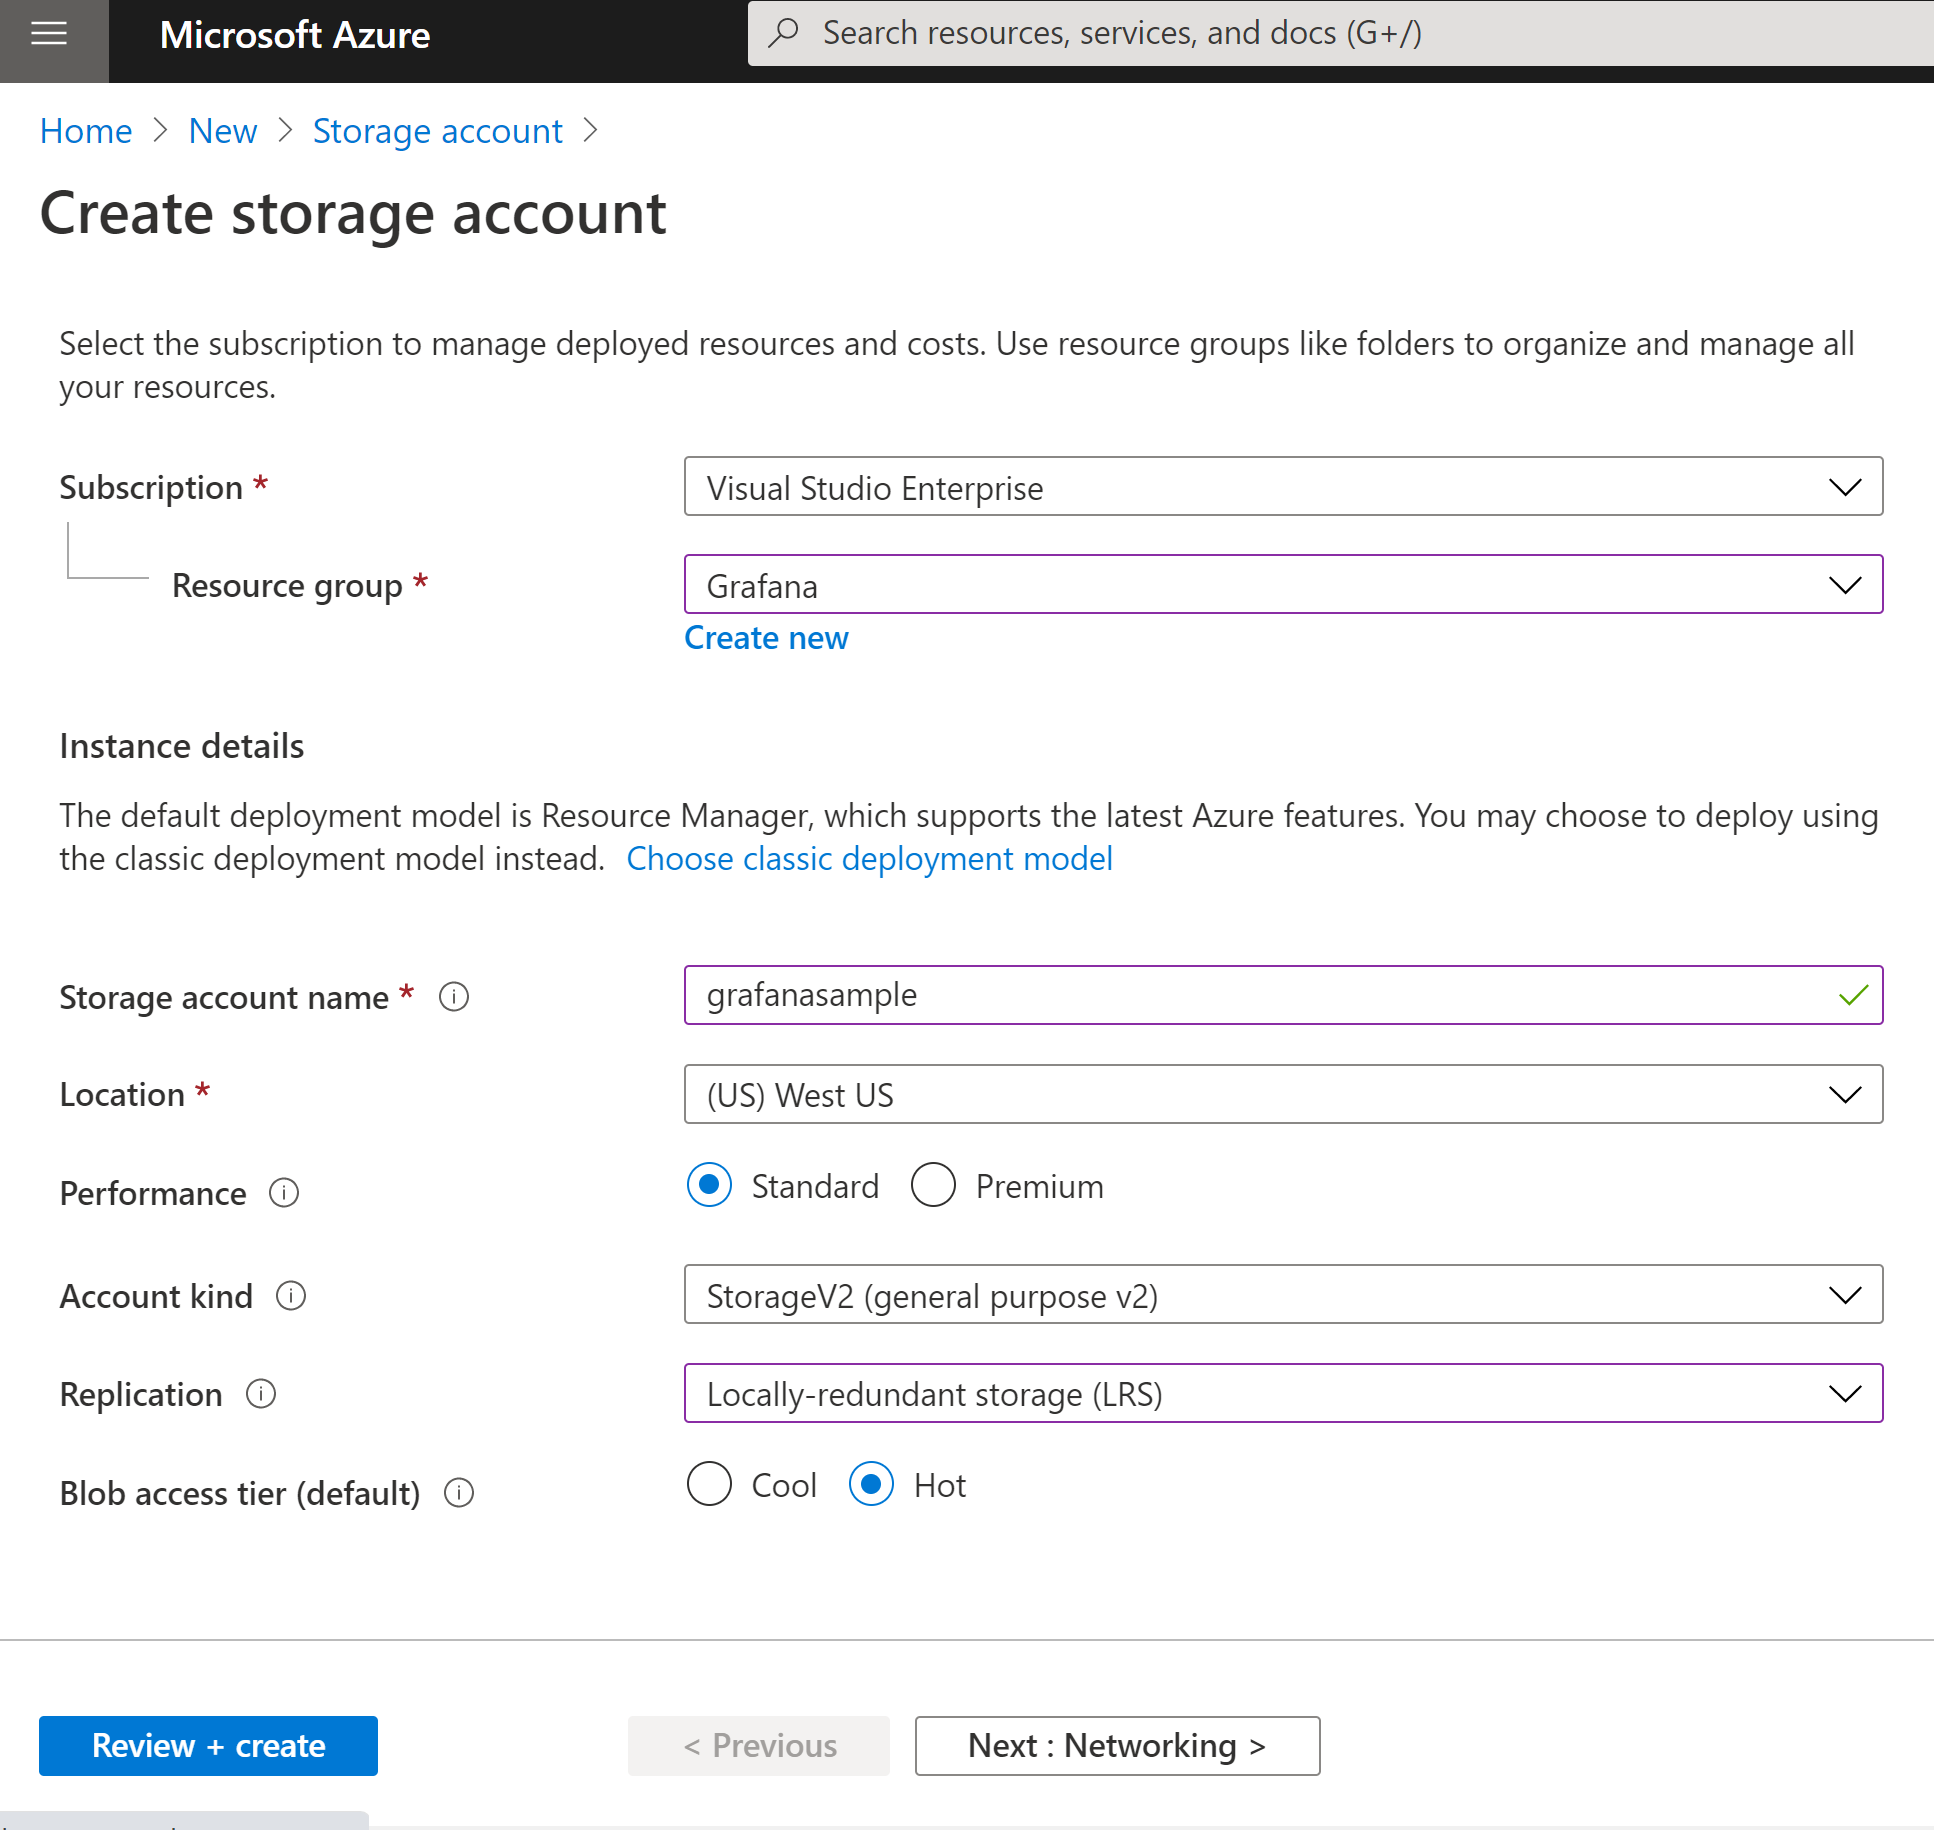
- Click Review & Create
- Create the Resource
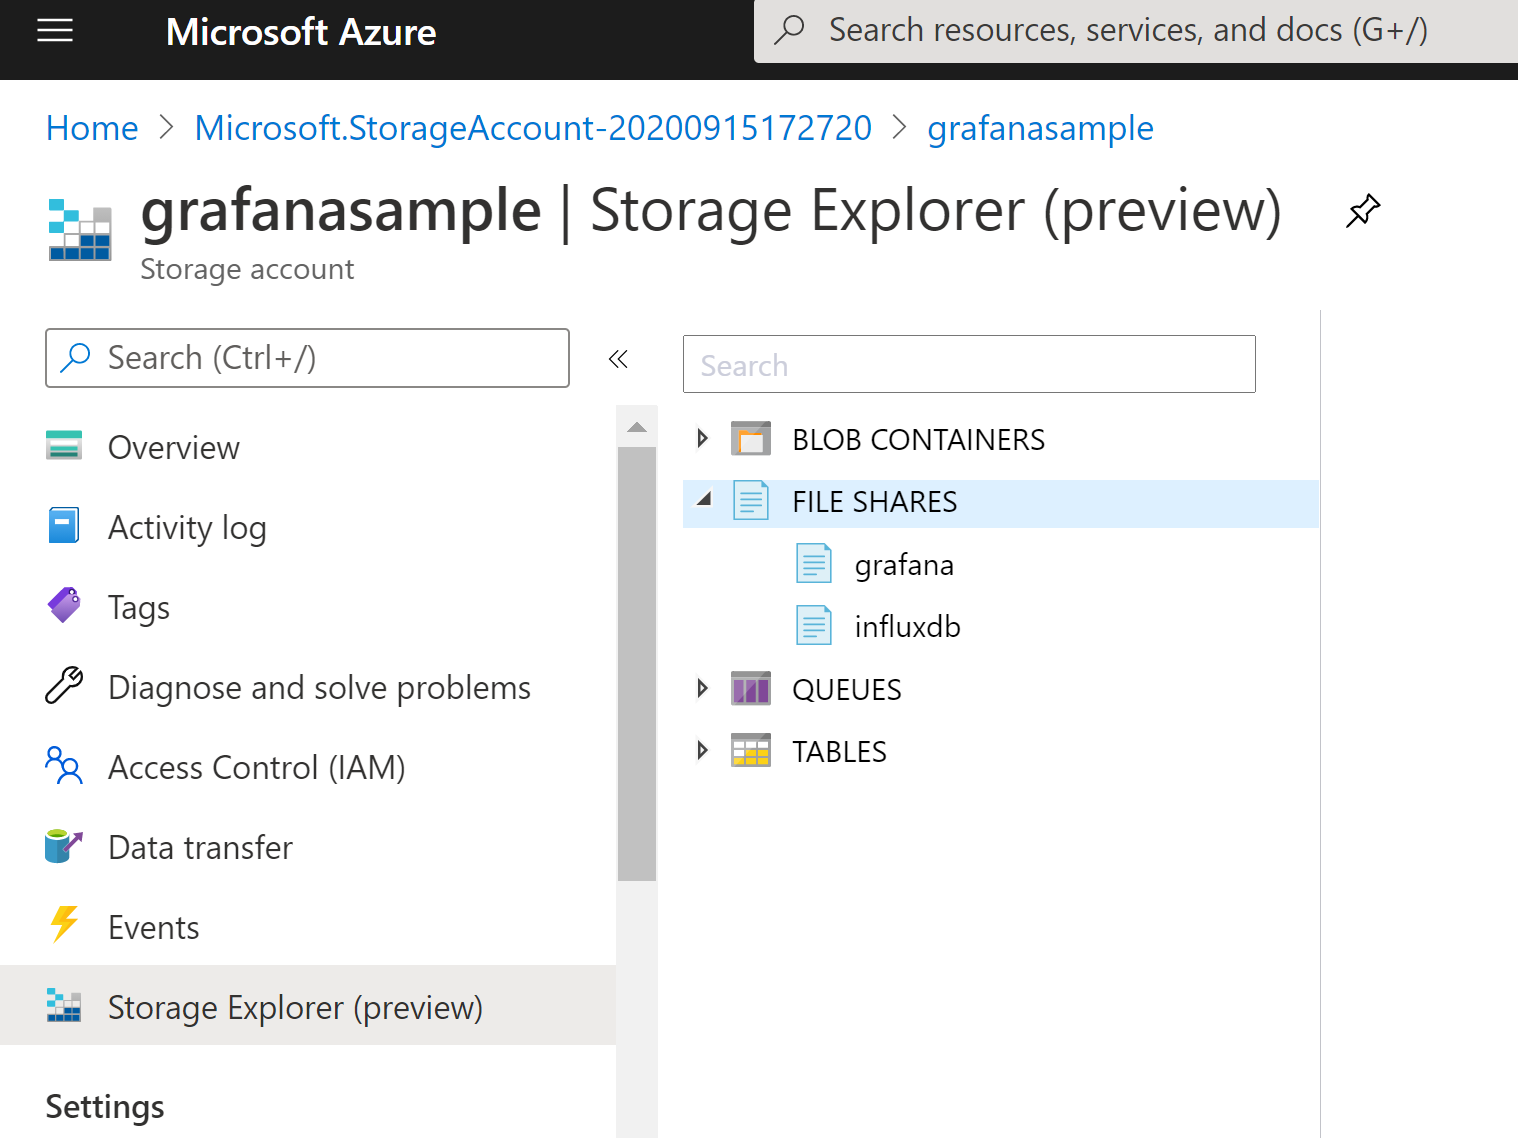
- Once created, go to the resource and open Data Explorer blade
- Right click on “File Shares” and create 2 named grafana and influxdb
App Service (InfluxDB)
- Create App Service
- Use the following settings:
- Resource Group: Grafana (no reason it shouldn’t exist by now)
- Name: influxdb-sample (will need to be globally unique)
- Publish: Docker
- Operating System: Linux
- Region: Select the same as App Service Plan
- Linux Plan: Select the App Service Plan created above
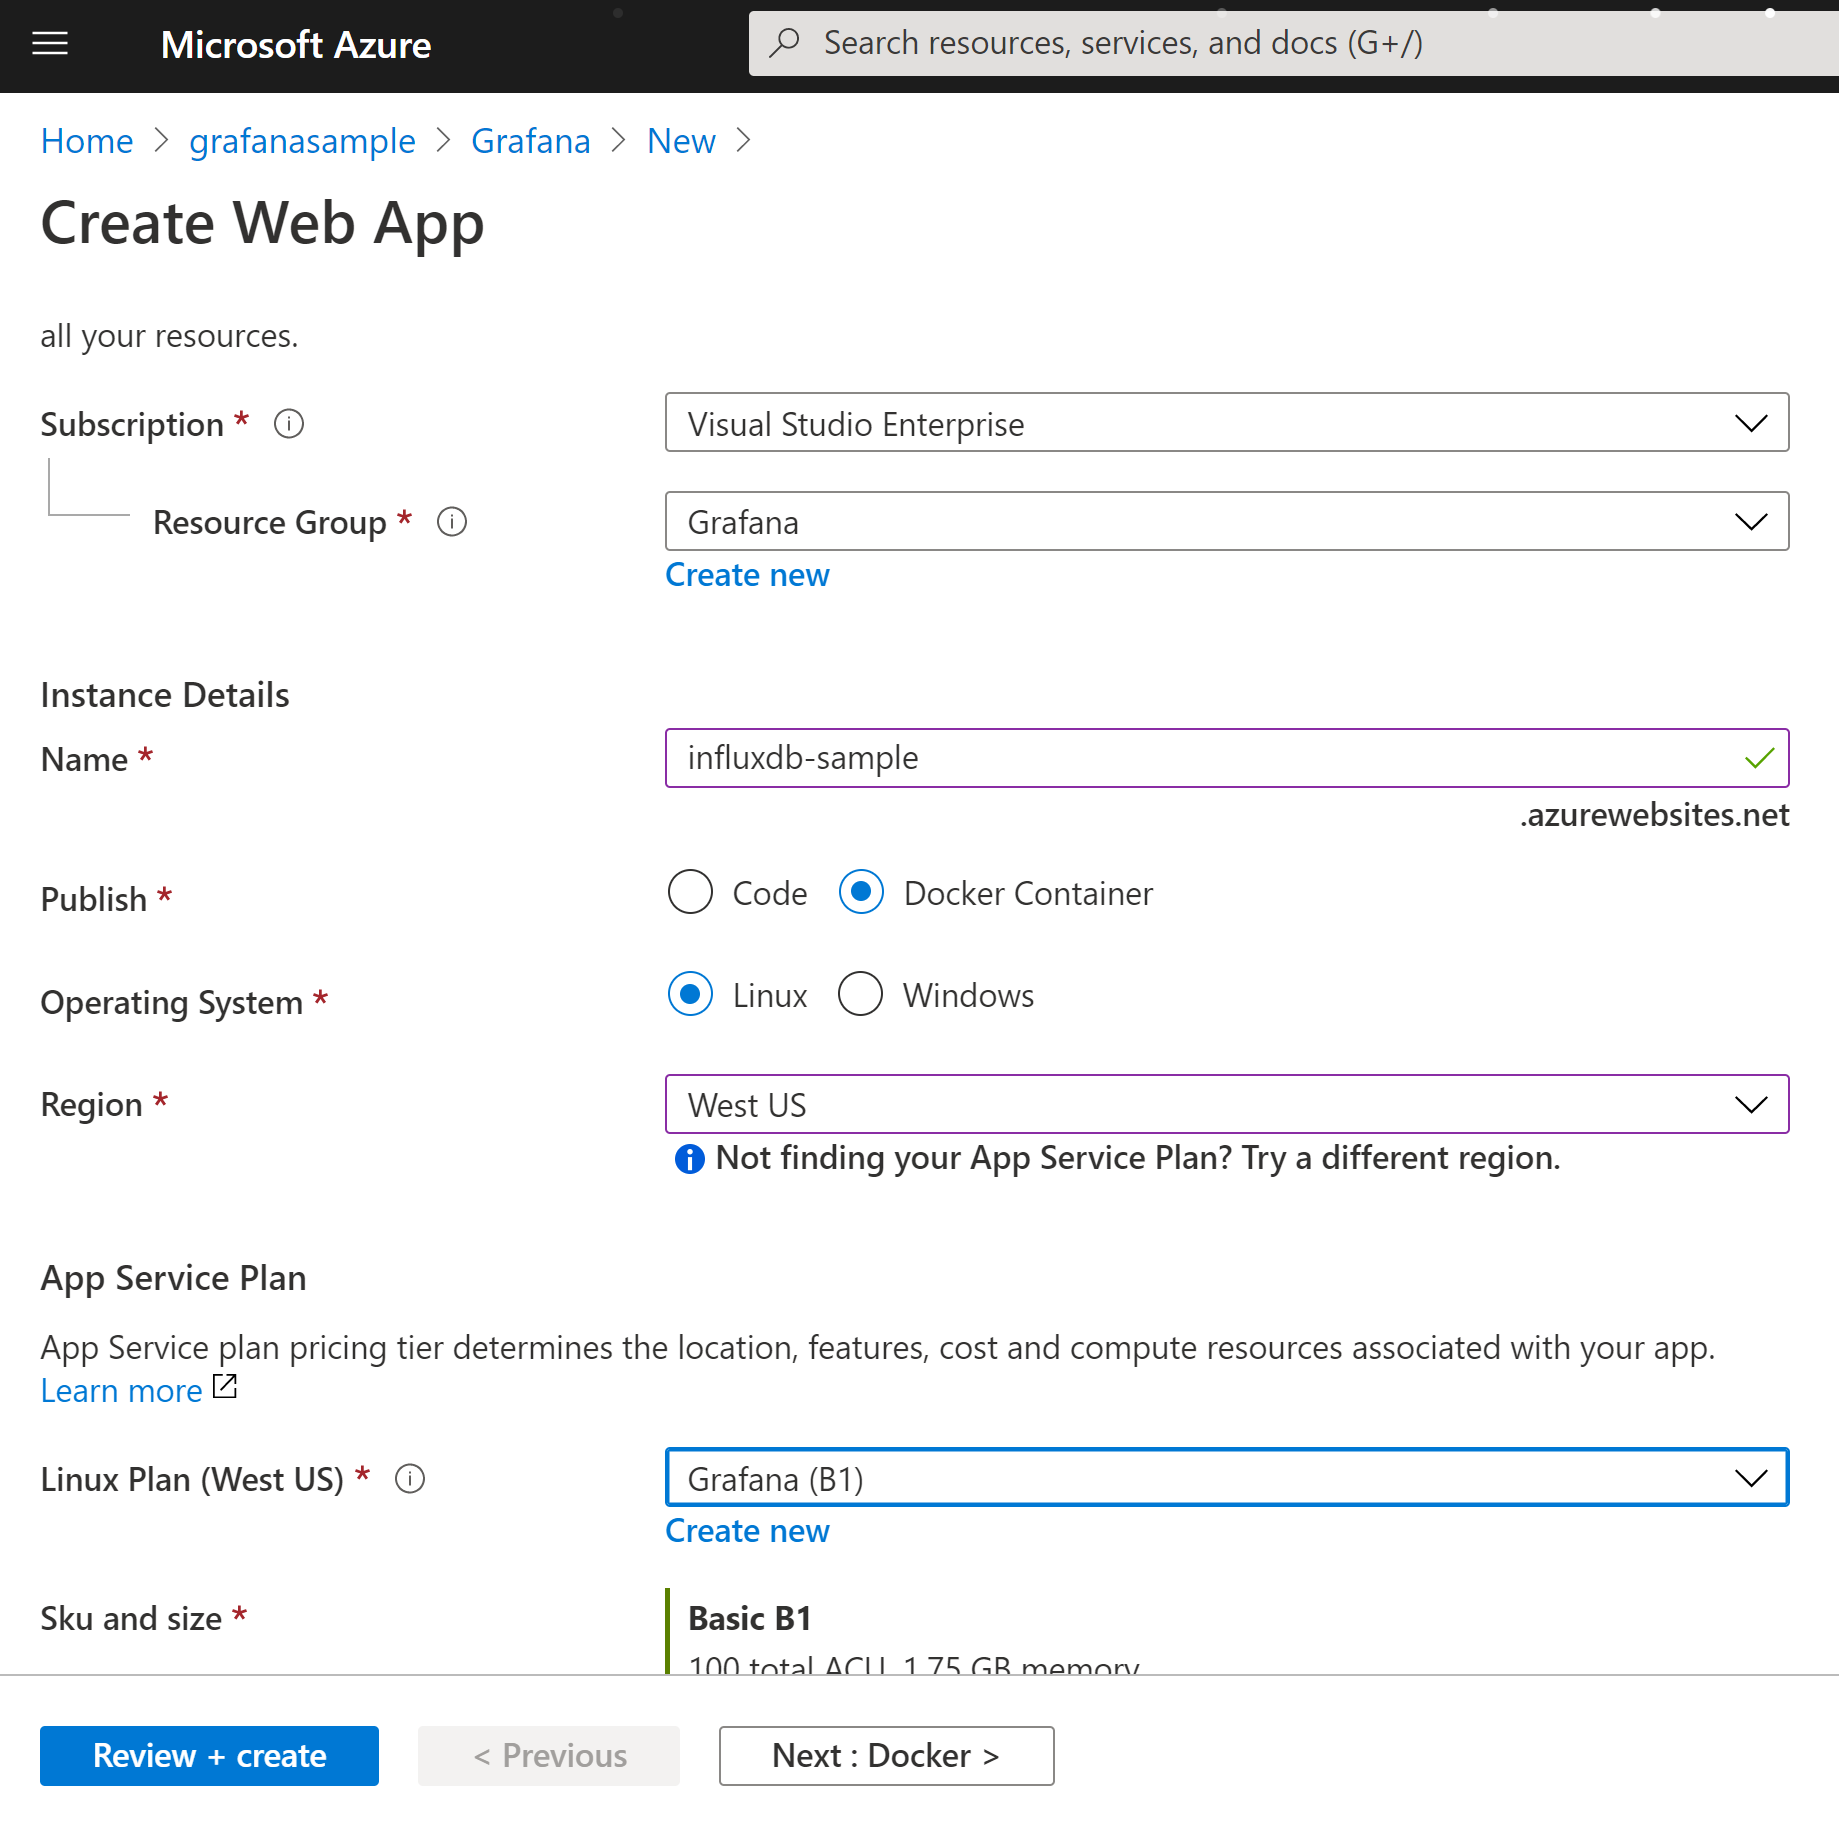
- Click “Next: Docker”
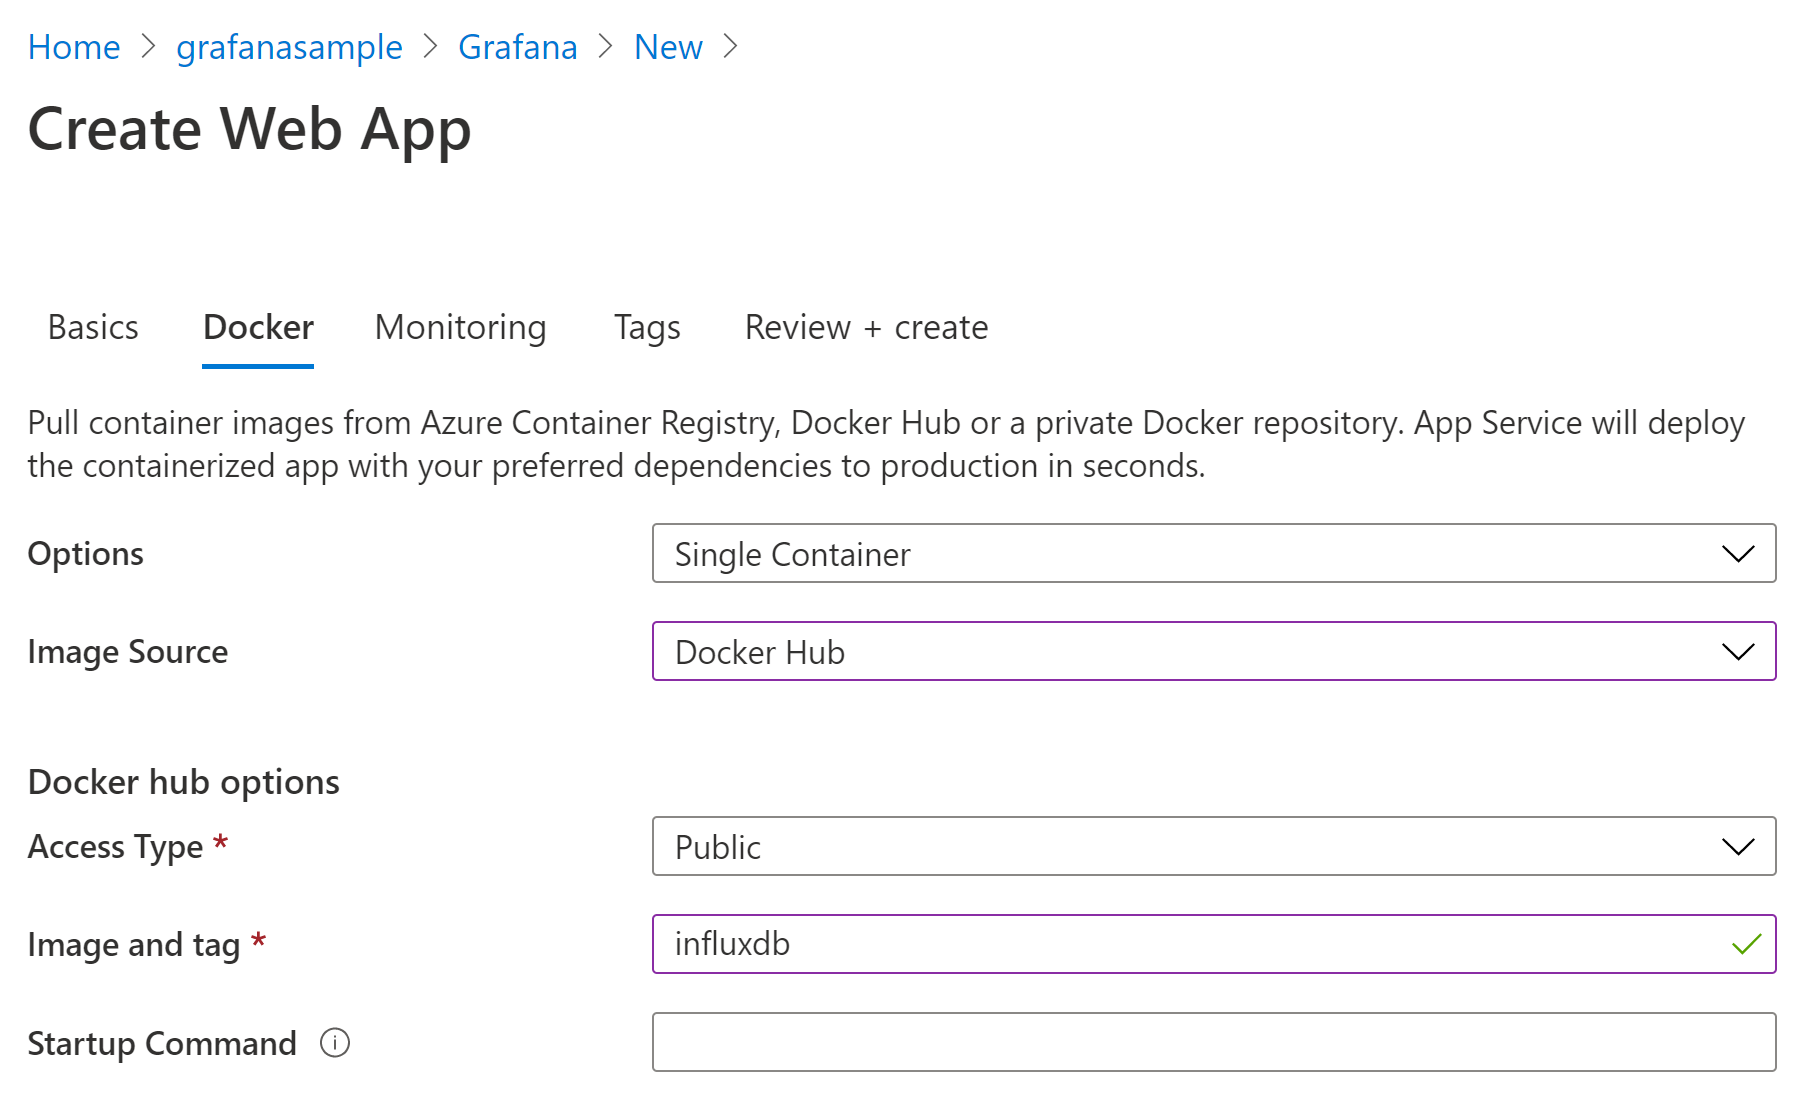
- On the Docker section use the following settings:
- Options: Single Container
- Image Source: Docker Hub
- AccessType: Public
- Image and Tag: influxdb (you can also do influxdb:latest or any other version)
- Click Review & Create
- Create the Resource
- Once created, you can check to make sure the App Service loads up with the container. Open up a browser and navigate to https://{app name}.azurewebsites.net/health.
- Stop the App Service
- Go to the Configurations blade
- Under Application Settings, add the following keys:
- INFLUXDB_ADMIN_USER: admin
- INFLUXDB_ADMIN_PASSWORD: {strong password}
- INFLUXDB_DB: firstdb
- INFLUXDB_USER: firstuser
- INFLUXDB_USER_PASSWORD: {strong password}
- INFLUXDB_HTTP_AUTH_ENABLED: true
- If you want to set any other environmental variables, now is the time to add them Docker Hub InfluxDB
- Under General Settings, set the following values:
- Always on: yes
- Under Path Mappings, add a storage account mount with these settings:
- Name: Data
- Configuration Options: Basic
- Storage Accounts: Select the one created earlier
- Storage Type: Azure Files
- Storage Container: influxdb (container created earlier)
- Mount Path: /var/lib/influxdb
- Under Application Settings, add the following keys:
- Go to the SSL/TLS blade
- Set HTTPS Only to On
- Start the App Service, after a minute you should be able to go to the health endpoint and you will now be required to enter your admin credentials.
- Stop the App Service
- Go to the Configurations blade, delete the following Application Settings (they are no longer needed now that they have been initialized)
- INFLUXDB_ADMIN_USER
- INFLUXDB_ADMIN_PASSWORD
- INFLUXDB_DB
- INFLUXDB_USER
- INFLUXDB_USER_PASSWORD
- Start the App Service
App Service (Grafana)
- Create App Service
- Use the following settings:
- Resource Group: Grafana (no reason it shouldn’t exist by now)
- Name: grafana-sample (will need to be globally unique)
- Publish: Docker
- Operating System: Linux
- Region: Select the same as App Service Plan
- Linux Plan: Select the App Service Plan created above
- Click “Next: Docker”
- On the Docker section use the following settings:
- Options: Single Container
- Image Source: Docker Hub
- AccessType: Public
- Image and Tag: grafana/grafana
- Click Review & Create
- Create the Resource
- Go to the SSL/TLS blade
- Set HTTPS Only to On
- Under General Settings, set the following values:
- Always on: yes
Grafana should be up and running in default mode, make sure to login and configure security.
Grafana Startup Fix
Regardless of which way you setup Grafana, the instruction above work but aren’t persistent. Your dashbaords and settings can be wiped at anytime. We want to move the Grafana storage to persistent storage like we did for InfluxDb, but there is just a small problem. It fails to startup when moved to persistent storage, there is a Github issue around it and a workaround! Github Error on Azure Container Instances: Migration failed err: database is locked #20549
Assumption is you already created the grafana file share in your Azure Storage Account.
- Stop the Grafana App Service
- Generate a Grafana.db file locally using sqllite (requires Chocolatey) with journal mode wal
choco install sqlite3 sqlite3 grafana.db 'pragma journal_mode=wal;' - Upload the grafana.db file to your storage account, grafana file share root
- Map the fileshare to your App Service (see steps below)
- Startup the App Service
Grafana Persistence
Add an Application Setting
GF_DATABASE_URL: “sqlite3:///var/lib/grafana/grafana.db?cache=private&mode=rwc&_journal_mode=WAL”
Under Path Mappings, add a storage account mount with these settings:
- Name: Data
- Configuration Options: Basic
- Storage Accounts: Select the one created earlier
- Storage Type: Azure Files
- Storage Container: grafana (container created earlier)
- Mount Path: /var/lib/grafana
Connect The Two
At this point the two are setup, you can start push time series data into the InfluxDB database using the username and password. Setting up a data source is also pretty trivial (just use https and port 443 for everything, not the defaults!).